Arc is a new browser that aims to shake up the way you typically work with webpages, tabs and other items. Like Chrome and Edge, Arc is based on the Chromium engine; this means you can install extensions from the Chrome web store. But Arc, which is developed by The Browser Company, tries to move beyond the expected with options that should interest business users.
With Arc, you can create and switch among multiple profiles — perhaps one profile for work and another for personal use. You’re able to generate spaces to hold different webpages, media and other content. Plus, Arc displays your bookmarks and tabs in a sidebar where you can more easily view and manage them.
For now, Arc works only in macOS and iOS, though a Windows version is slated for launch later in 2023. Here’s how to use Arc on a Mac.
Jump to:
Install Arc on the Mac
First, using your Mac, head to the Arc website, click the Download Arc button and follow the steps to install the browser. Arc opens, prompting you to set up a free account. The account is used to sync your browsing data across your Mac, iPhone and any other supported iCloud-enabled devices. Click the link for Create An Account. Enter your name and email address, create a password and then sign in.
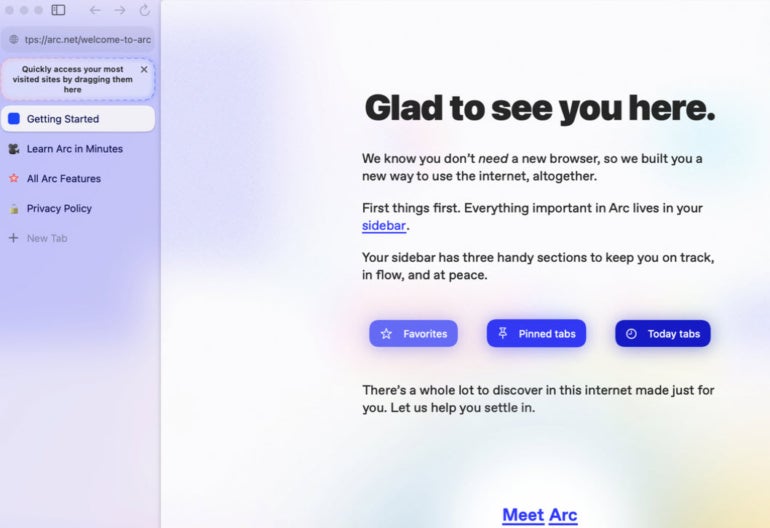
Next, you can dive in with a tour that explains how Arc works. Click each of the topics in the left sidebar to go through the tutorial, check out Arc’s core features and review the privacy policy (Figure A).
Figure A
Import data into Arc from another browser
To fully take advantage of Arc, you may want to have all your existing bookmarks, cookies, passwords and other data from your default browser. Click the Arc menu and select Import From Another Browser. Choose the browser from which you want to import the data (Chrome, Safari, Firefox or Edge) and click Next (Figure B).
Figure B

You’re then asked if you want to import your data into your existing profile or a different profile – choose your existing profile. Check the box for Replace Existing Cookies With Imported Cookies if you haven’t yet generated any cookies you want to keep. Click Import (Figure C).
Figure C

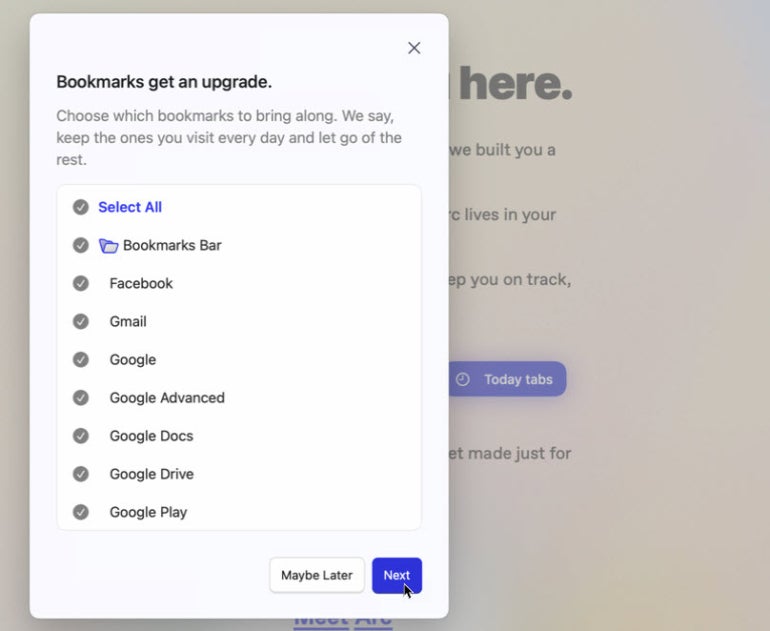
You might be asked to enter the password for your keychain. Type the password for your Mac and then click Allow. Next, choose the bookmarks you want to import into Arc or click Select All to include them all and click Next (Figure D).
Figure D
Your bookmarks will appear in the sidebar under a folder with the name of the source browser (Figure E).
Figure E

Open new tabs in Arc
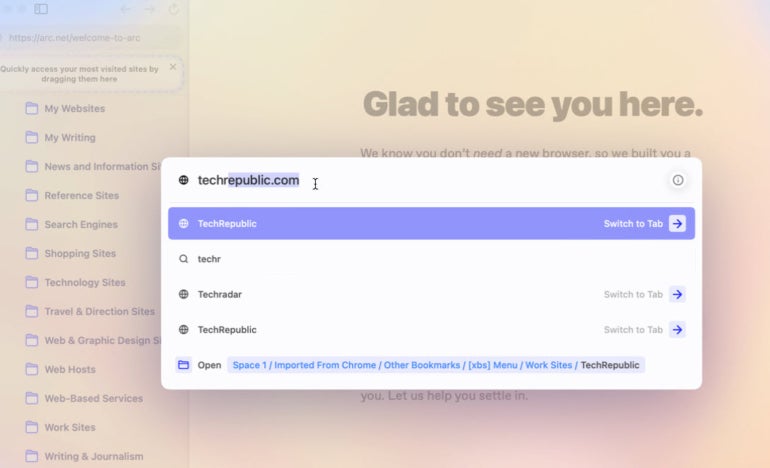
Now you may want to check out different websites. In Arc, to open a new tab, click the File menu and select New Tab or press Command+T. At the popup window, type the URL of the website you want or enter a word or term to search for a site (Figure F).
Figure F
As you open new tabs with new pages, you’ll see the pages appear in the sidebar. If the page is saved as a bookmark, its pinned tab will appear under your bookmarks folder. Otherwise, the tab shows up at the bottom. To switch to a different tab, just click its sidebar entry. To open more tabs, click New Tab on the sidebar.
To manage a tab in the sidebar, right-click on it. From the popup menu, you can open it in Split View to see it side-by-side with another page, share the page, move or save it to a specific folder, rename it, change the icon, close it and run other commands (Figure G).
Figure G

Access most-visited sites via Arc
Rather than hunt for specific websites among your bookmarks or searches, you can place links to them at the top of the sidebar where they’re always accessible. Just drag and drop a pin to the spot that says Quickly Access Your Most Visited Sites By Dragging Them Here. The pins remain there for easy access (Figure H).
Figure H

Create a new space in Arc
Instead of juggling a lot of different websites, tabs and other items all in one space, you can create new spaces for each type of content. For instance, you may want to create a dedicated space for a temporary work assignment, a team project or a class you’re taking. Click the Spaces menu and select New Space or click the X icon at the bottom of the sidebar and select New Space. Open the websites you want to use in your new space.
Beyond adding websites, you can add other content. Click the X icon at the bottom of the sidebar. Click New Folder to create a folder into which you can move your tabbed pages. Click New Easel to create a whiteboard on which you can diagram ideas. Then, click New Note to type a note related to this space (Figure I).
Figure I
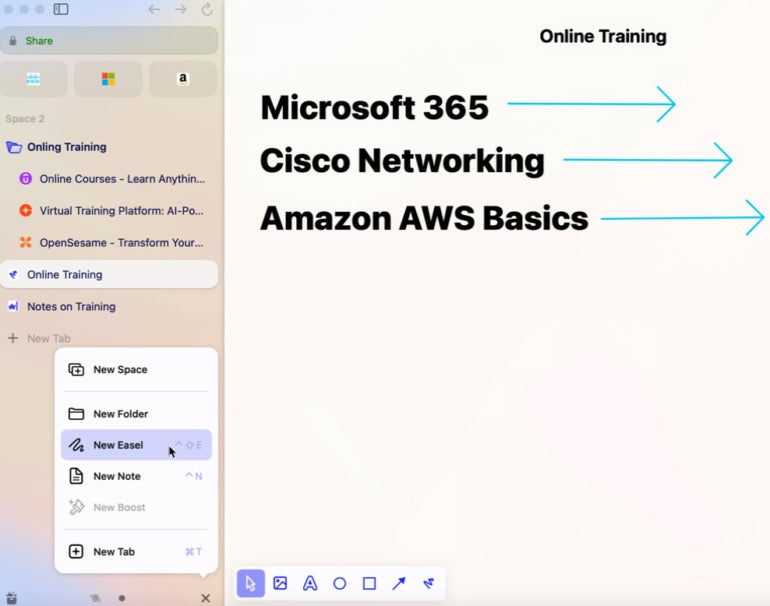
After setting up more than one space, you can jump from one to another. Click the Spaces menu and select the space or click the icon at the bottom of the sidebar for the space you wish to see. To access more commands, right-click on the sidebar for a specific space. From the menu, you can create a new folder, rename the space, manage and view your spaces side by side and delete a space (Figure J).
Figure J

Create a new Arc profile
By default in Arc, all of the tasks you perform, the sites you use, the bookmarks you create and the extensions you install are stored within a single profile. To further separate and manage your online activities, you might want to create another profile. For example, you could have one profile for business use and another for personal use. Each profile is assigned to a specific space so you can access its content.
To create a new profile, click the File menu and select New Profile. Name your new profile and click Next (Figure K).
Figure K
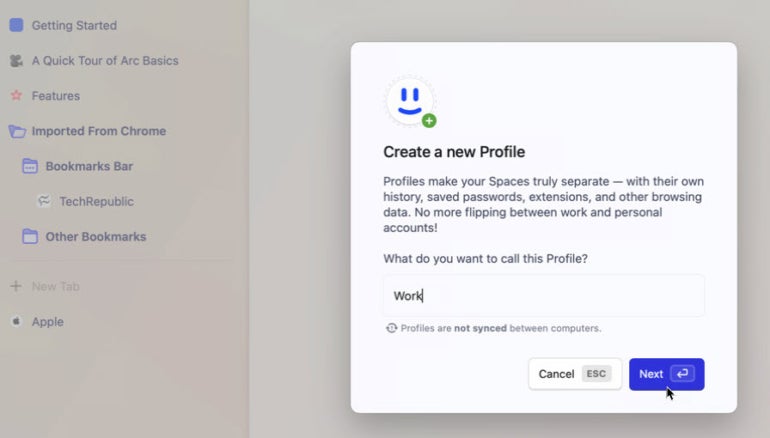
Choose which space or spaces you wish to use in the new profile and then click the Create Profile button. You’re prompted to switch to your new profile – click the Switch It Up button to do so (Figure L).
Figure L
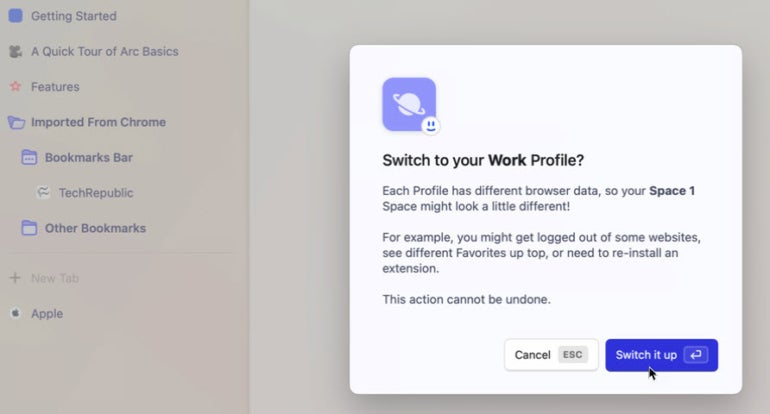
Note: Only the content in the space you included will be available in your new Arc profile. Any extensions you installed, for example, would need to be reinstalled if you need them in the new profile.
Install Chromium-compatible extensions and control Arc
There’s even more to Arc than what is covered in this article. You can head to the Chrome Web Store to install any Chromium-compatible extension, view your downloads and other content and set Arc as your default browser.
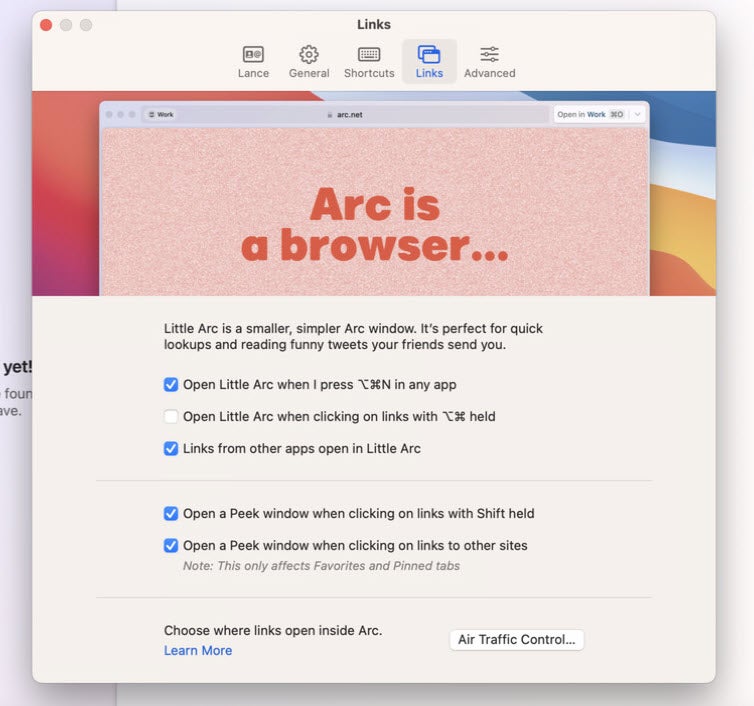
To control Arc, click the Arc menu and select Settings. From here, you’re able to view and manage your profiles and data, see all the available shortcuts for using Arc and even open a mini version of the browser called Little Arc to quickly open a webpage or run a search (Figure M).
Figure M
